I’d like to share my approach to creating good makeup. I don’t consider myself an expert in this field and still have a lot to learn. I know the basics and remember how hard it was to get started. That’s why I’ll show you my process, how to conceal beard shadow, slim the face, and emphasize eye color. I’ll also demonstrate a way to apply makeup even when presenting as male. Let’s dive in.
Preface
It’s often said that every woman should wear makeup. Thankfully, times are changing, and we’re seeing a trend towards natural looks. On the other hand, makeup for men is still a rarity, occasionally seen in the music world. Artists like David Bowie, Prince, or Poland’s own Michał Szpak show that the only limit is imagination. With makeup, we can “feminize” our face, highlight certain features, and conceal others.
Makeup comes in many styles. It can be subtle and nearly invisible, often preferred by those who are confident in their natural look or want a quick routine. Then there’s full makeup with foundation, lipstick, and eyeshadow, which enhances feminine beauty but takes more time. Special occasion looks, like bridal or stage makeup, often require professional skills and more effort. Lastly, there’s Drag Queen makeup, which exaggerates all elements to an extreme.
Makeup can also be categorized by intensity—light, medium, and heavy—depending on the shades and colors used. For example, a bride might want a full but natural look for daylight, while an actress on stage needs bold colors to stand out from a distance. I prefer light makeup; I don’t feel comfortable in heavy, dramatic looks, even for evenings out. Everyone is different and should find what suits them best.
Skincare
The first step to great makeup is proper skincare. A good foundation can hide a lot of imperfections, but daily hydration is a much better solution. Preparing your skin for makeup is essential, as makeup can put a lot of stress on your tissues.
The challenge arises when you need to choose the right product from the overwhelming variety in stores: day creams, night creams, eye creams, anti-wrinkle creams, toners, and so on. You don’t need to dive in headfirst by buying everything at once. In my opinion, one moisturizer used daily in the morning and evening is enough to start with. Your skin will thank you. Over time, you’ll discover what works for you and fits your budget—some products can be very pricey. Personally, I use just one moisturizer, and it’s sufficient for now.
Shaving
The second step, especially in our case, is thorough shaving. A standard razor blade is the best option for a close shave. Electric razors are more convenient but can’t achieve a completely clean shave. If you get a cut, alum can help stop the bleeding. A good moisturizing aftershave balm will prepare your skin for the next steps. Wait at least 15–30 minutes before applying makeup to give your skin time to recover.
Primer
The next step is applying a makeup primer. This cream hydrates and smooths the skin, providing a better base for makeup and making it last longer. Often overlooked, a good primer is worth investing in. Most primers are neutral or white, but if possible, choose a pink one to help neutralize beard shadow (more on that later). Spread the primer evenly over your face and neck with your fingers, just like a moisturizer.
Concealing Beard Shadow and Color Correctors
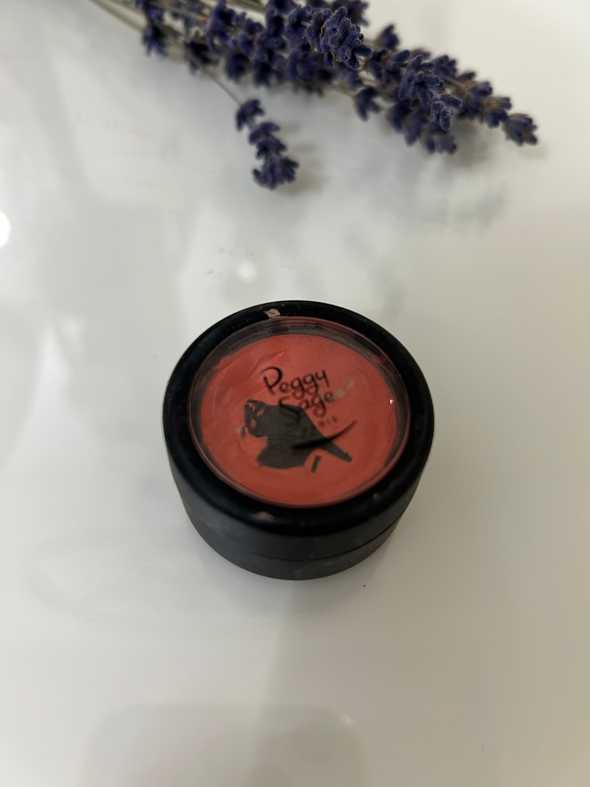
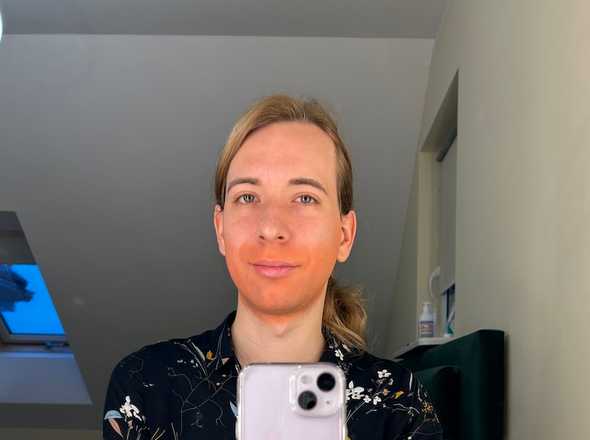
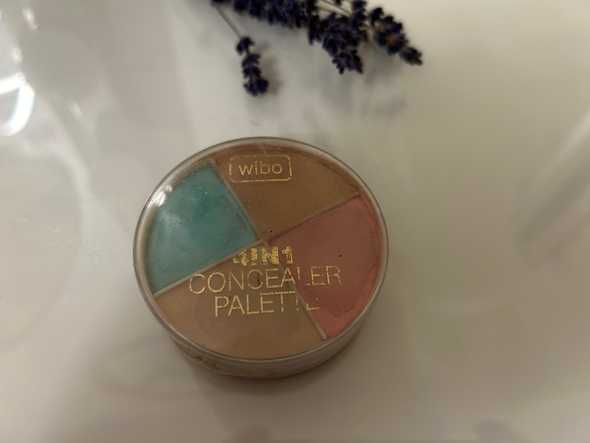
My biggest challenge has always been concealing the beard shadow that peeks through makeup. Thankfully, there’s a clever trick for this. Beard shadow typically has a grayish-blue tint, so to neutralize it, you need an opposite color: orange or pink. Look for a concealer in one of these shades and apply it over your beard area before foundation. It might look odd—some call it “Trumpism”—but trust me, it works! Some people use red lipstick instead of concealer, though I haven’t tried it myself. Experiment to find what works best for you; in my case, orange concealer works better than pink.
Color-correcting palettes also include shades for other imperfections. Green neutralizes redness, purple balances yellow tones, and orange cancels out purple hues. While I don’t often use other colors, they’re helpful for occasional emergencies. A small palette is a good investment for such situations.
Foundation
Choosing the right foundation is a daunting task. They come in liquids or powders and have various types: hydrating, mattifying, illuminating, smoothing, etc. Plus, you need to match the shade to your skin tone. This is easiest to do in a store with testers, which you should try on your neck to check for a match. Avoid applying testers directly to your face, as you don’t know who else has used them or whether they might cause a reaction. Lipstick testers should also be tested on your hand, not your lips.
What foundation should you choose? Liquid, medium-to-full coverage foundations work best. Avoid theatrical, heavy-duty formulas—they might cover everything but can transfer onto clothes and be difficult to clean. Your first few purchases might be misses, especially if buying online, but a good foundation is key.
How to apply foundation? Use a sponge or a brush; I prefer a sponge. Wet it slightly to prevent it from absorbing too much product. Dispense a small amount of foundation onto the back of your hand, then apply it to your face, neck, and décolletage in small, delicate motions. Don’t forget to blend well to avoid stark contrasts between your face and body. If you choose the wrong shade, it will be very noticeable. While applying foundation is time-consuming, practice makes perfect.
Contouring
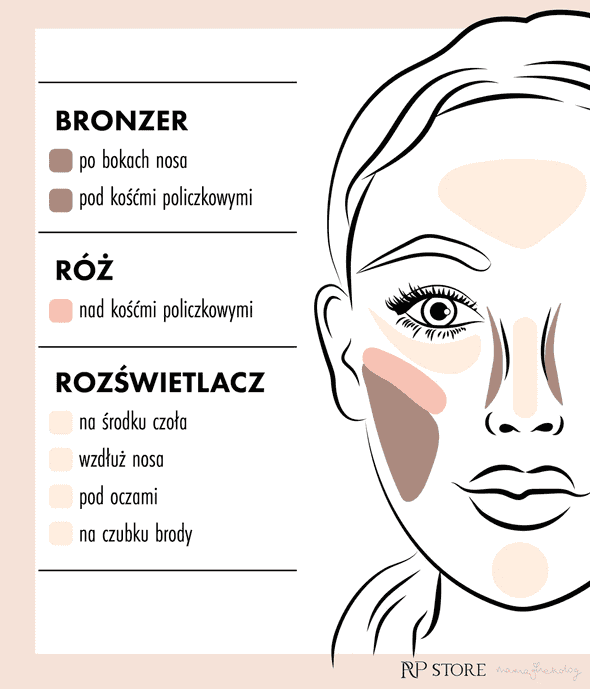
Contouring can be done using wet or dry techniques. The wet method is more challenging but produces more pronounced results. Unfortunately, I don’t have much experience with it, so I’ll focus on the dry method. The general rule is that lighter colors highlight and enlarge, while darker colors shrink and slim. It’s a good idea to start with a contouring palette containing a light powder, a dark powder, and sometimes a blush. Many palettes include a guide on where and how to apply each shade.
Generally, you use the lighter shade to highlight areas like the center of the forehead, the bridge of the nose, under the eyes, and sometimes under the nose and lips. Highlighting the middle of the face makes it appear slimmer. The darker shade is used to contour and slim areas like the outer edges of the forehead (near the hairline), the sides of the nose, and the hollows of the cheeks. For the cheek area, find where the natural shadow falls when light hits from above or where you want the shadow to appear. This creates the illusion of a slimmer face.
Source: https://rpstore.pl/blogs/rp-blog/konturowanie-twarzy-jak-konturowac-twarz-krok-po-kroku
Use a contouring brush to apply the powders. Afterward, blend (or “buff”) the colors to ensure smooth transitions between shades. However, you can leave the top edge of the darker shade on your cheeks unblended for a sharper profile.
Finally, you can add blush to the cheeks. My technique is to lightly tap the blush with a brush three times in the area you want the most color, then move upward and outward, tapping twice more, and once again near the top. This creates a natural gradient. Don’t forget to blend at the end.
Watching videos on contouring can be very helpful, especially for visualizing the process. In our case, the darker powder can also be used to minimize the appearance of an Adam’s apple or prominent jawbones.
Setting Powders
Apply a loose setting powder over your foundation to set your makeup, mattify your skin, and reduce shine. You don’t need much—apply it lightly.
Instead of liquid foundation, you can also use a powder foundation. It’s lighter but won’t cover imperfections as effectively. This works well if you’ve already removed facial hair with laser treatments. Otherwise, I recommend liquid foundations for better coverage.
Eyebrows
Don’t neglect your eyebrows; they can enhance or ruin your makeup look. Men’s eyebrows are often fuller, which is noticeable in beginner crossdressers. Ideally, shape them with tweezers or visit a salon. If you’re concerned about reactions to drastic changes, you can gradually shape them by plucking stray hairs outside the natural brow line, then adjusting over time until you achieve the desired shape.
If reshaping isn’t an option, you can reduce eyebrow volume with clear brow mascara. After applying, pinch the hairs in the middle of the brow with your fingers to make them appear thinner. While this won’t achieve dramatic results, it’s a subtle improvement.
Another method involves completely concealing your brows with foundation and drawing new ones, as Drag Queens often do. This requires skill and results in a bold look that may not suit everyday life but works well on stage.
You can also enhance your eyebrows using a brown pencil or eyeshadow in a matching shade (or black for black hair). Experiment with tutorials online to find a shape that suits your face. Avoid extremes—neither too thin nor too thick brows are ideal. Trends change, but natural-looking, well-groomed brows are always in style.
Eyeshadow
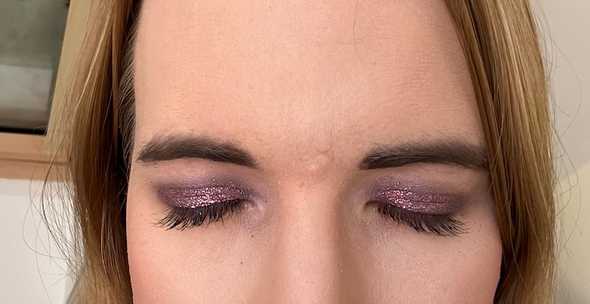
Eye makeup offers endless possibilities, especially for evening looks where you can get creative. However, moderation is key. An eyeshadow primer can be helpful, as it enhances colors and prolongs their wear. You can also apply shadows directly to your skin; for beginners, this is enough.
The general rule is to use lighter shades on the inner corners of your eyes and darker shades on the outer corners, which makes your eyes appear larger. There are many techniques, sequences, and color combinations to explore. A variety of brushes will also be useful. Watch tutorials, look at pictures, and draw inspiration from others. Complementary colors can enhance your eye color—for example, pinks and purples for green eyes, greens and blues for brown eyes, and browns for blue eyes.
Experiment to see what works for you. Personally, I love pink shades, but feel free to try different hues to find your favorite.
Eyeliner
After applying eyeshadow, you can further define your eyes with eyeliner. Apply it along the lash line, either on the upper or lower eyelid, or both. Be cautious to avoid injuring your eyes. At first, use eyeliner sparingly until you’ve practiced enough to create straight lines. If you want to create “cat eyes,” you’ll need to put in some extra effort to ensure the lines are symmetrical and even.
I personally use eyeliner daily to subtly define my eyes. Avoid heavy eyeliner on the lower eyelid, as it can make you look older. I also recommend trying brown eyeliner—it’s more forgiving of mistakes.
Eyelashes
Men generally have longer and denser eyelashes than women, so they don’t need as much enhancement. Often, mascara alone is enough to make them look great. Applying mascara takes practice, as any mistakes (e.g., touching the skin) are immediately noticeable. Higher-quality mascaras are easier to apply and less likely to clump lashes together. If clumping occurs, wiggle the wand side-to-side as you apply it to help separate the lashes.
You can also use an eyelash curler before applying mascara to give your lashes a more rounded appearance. Look up tutorials online if you’re unsure how to use one. My wife uses one, and it works well for her.
Another option is false eyelashes, either individual lashes or full strips. They’re a great solution if you want more volume, but they require practice and can be time-consuming. Always use safe, non-expired glue to avoid irritation or damage to your eyes. Be mindful of proportions—overly dramatic lashes might not look great in everyday life and can feel heavy.
Lips
In my opinion, lipstick is the finishing touch to any makeup look. I love experimenting with different shades of lipstick, which can beautifully enhance your lips and entire face, provided you choose the right color.
The general rule is to decide whether you want to emphasize your eyes or your lips. If you use bold eyeshadow colors, opt for a more natural lipstick shade. Conversely, if your eye makeup is subtle, you can go for a bolder lip color. For evening events, feel free to get creative. Just remember that vivid red lipstick is highly unforgiving—it’s ultra-feminine but difficult to incorporate into a balanced look. It also highlights the color of your teeth, so make sure they’re white if you choose this shade.
To make applying lipstick easier, outline your lips with a lip liner first. This helps define the boundaries and makes application smoother. Lipstick primers are also available to improve longevity.
Unfortunately, lipsticks leave marks on glasses, cups, and even other lips. Higher-quality products are more durable and leave fewer traces. I own one such lipstick, and it works wonders—though it’s harder to remove at the end of the day. It’s a trade-off.
Setting Spray
To finish, you can use a setting spray to ensure your makeup lasts longer. I don’t use it often, so I can’t provide much detail, but it seems to work well.
Makeup Removal
Micellar water is a popular choice for makeup removal. I recommend also using a face wash with micellar water for quicker removal, such as in the shower. If any makeup remains, use cotton pads soaked in makeup remover to clean your face thoroughly. It’s important to remove all products at night, both to protect your bedding and to let your skin breathe and recover. Makeup wipes are another convenient option, especially for travel.
Before bed, apply a moisturizer to rehydrate your skin. You might also use a toner beforehand.
Caring for Makeup Tools
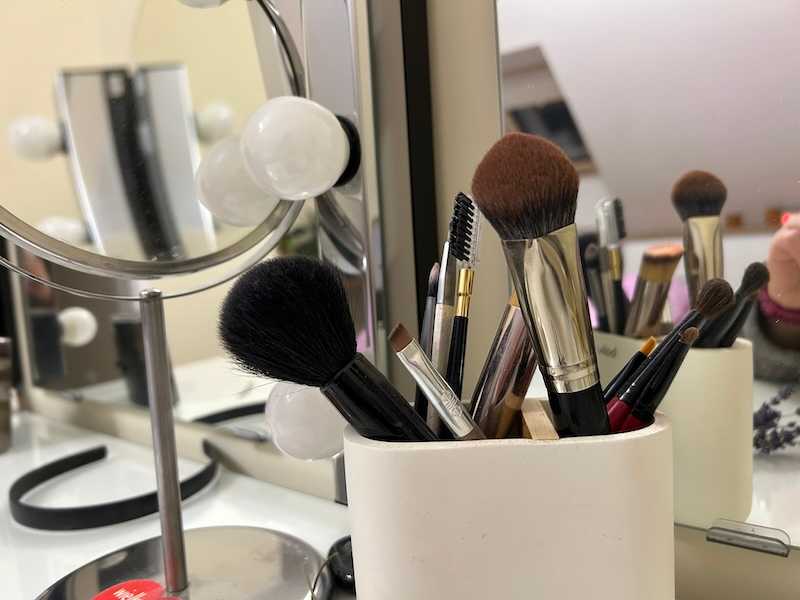
Brushes, sponges, and other tools should be cleaned regularly. These items come into contact with delicate facial areas like the eyes, which are prone to irritation. Pay particular attention to tools used for eye makeup. Wash them with soap or makeup remover and occasionally disinfect them with alcohol to prevent bacterial growth. You don’t want to risk an eye infection!
Makeup While Presenting as Male
If you want to wear subtle makeup while presenting as male, there are ways to do it. I do this daily—it makes me feel better, and no one has commented on it yet. Here’s what you can do to stay incognito:
- BB Cream: This is a fantastic product for everyone. It combines foundation, sunscreen, moisturizer, and other benefits depending on the brand. It’s not heavy, just evens out your skin tone subtly. I highly recommend it for daily use; it makes your skin look much better without a “caked-on” effect.
- Eye Definition: Use a neutral eyeliner or subtle eyeshadow to define your eyes. Start small and practice until you’re comfortable. Transparent mascara can also improve lash condition if it contains nourishing ingredients.
- Lips: Lightly enhance your lips with a lipstick shade similar to your natural lip color.
These small, everyday steps improve how I feel when I look in the mirror. Most people likely won’t notice, and even if they do, they’re unlikely to comment.
Conclusion
Practice, practice, and more practice. That’s the best advice I can give. You know your face best, so you’ll discover what works for you and what makes you feel good. Observe others’ makeup styles, pay attention to details, and try new techniques. The internet is full of free tutorials and guides. Search for “makeup for transgender individuals,” as cis women don’t need to conceal certain imperfections as much. You can also invest in professional makeup lessons, but be prepared that some makeup artists may lack experience with beard shadow or other specific needs.
I wish you patience and perseverance in learning. Have fun with makeup, experiment with techniques, and enjoy the process. Don’t get discouraged—it’s all part of the journey. And don’t forget to smile; it’s the best finishing touch to any look! 😊
